Who it’s for
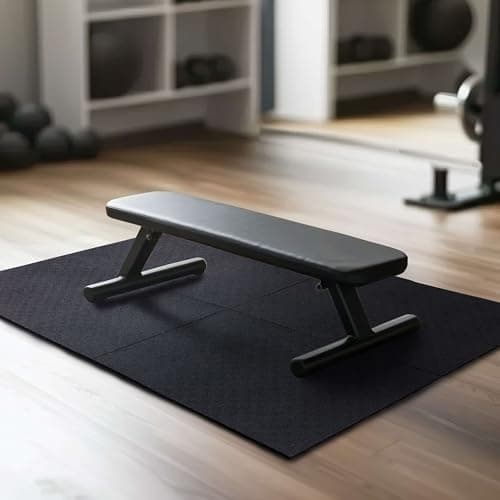
The Mohawk heavy-duty rubber stall mat is for the beginner who has picked out a rack, a bar, or a set of plates and suddenly realized the iron has to land on something. Flooring is the piece almost everyone forgets until the last minute, and then over-thinks. This mat is the simple, honest answer to the heavy end of that problem: a slab of dense rubber that sits under the part of your gym where weight actually comes down — under a rack, under a lifting platform, or in the drop zone where a loaded bar might hit the floor.
It suits you if you own a hard floor you care about: a garage slab you’d rather not chip, a basement, a spare room over a finished space, or any surface where dropped plates and a shifting rack would leave marks. It also suits the person who shares walls or floors with someone else, because a big part of what a dense mat buys you is quiet. If your setup is nothing but a pair of light dumbbells on carpet, you can probably skip rubber for now — but the moment a barbell, a rack, or a bumper set enters the picture, this is the flooring we’d point you toward first. Our home gym flooring guide lays out the full room plan if you want to see where every surface goes.
Who should look elsewhere? Renters who can’t justify moving something this heavy, and anyone building a light, foam-and-dumbbells corner in an apartment. For those setups, interlocking tiles are easier to live with — we cover the lighter option in our ProsourceFit puzzle mat review. But for a genuine strength setup with a rack and a bar, a dense rubber mat is the piece that protects everything else you bought.
What it does well
Three jobs, and it does all three at once. The first is floor protection. Plates get dropped, racks get nudged, and bare concrete or hardwood loses that fight every time. A thick rubber mat takes the hit instead — it shields the surface underneath from impact marks, scuffs, and the slow gouging that a heavy rack leaves as it settles. It also protects the equipment itself: a plate that lands on rubber survives far better than one that meets concrete. For the cost of one mat, you’re insuring a floor and a set of weights that both cost a great deal more.
The second job is noise control, and this is the one owners rave about most. Dense rubber deadens the sharp crack of a set finishing and swallows the shock that would otherwise travel through the floor and up the walls. In a shared house, an apartment building, or a basement below someone’s bedroom, that difference is the line between a gym you can use whenever you want and one that starts arguments. The mat won’t make heavy lifting silent, but it takes the edge off every impact, which is exactly what you need when the goal is to train early or late without waking the house.
The third job is a stable base. A rack wants to sit on something flat, grippy, and unmoving, and a dense mat gives it exactly that. Instead of uprights planted on a slick, cold slab that lets them creep, you get a surface that holds the rack’s footprint in place and dampens the wobble that heavy sets can set off. It’s the same story under a lifting platform or a drop zone: the mat gives the whole station a consistent, planted feel. If you’re still choosing the rack that goes on top of it, our best power racks and squat stands roundup is the companion piece.
And then there’s the reason this mat exists on a beginner site at all: it is genuinely low cost per mat. Flooring is one of the few places in a first home gym where you don’t have to compromise to stay on budget. A dense rubber mat is the cheapest real flooring we’d actually put under a loaded setup, which is why it earns a place in a costed beginner build. You can see how it slots into a full plan in our $1,000 Build, where flooring is a small line item that protects every other one.
Where it falls short
The honest knocks here are physical, not about quality. The clearest one is that this mat is heavy to move. The density that makes it work — the same mass that deadens noise, resists dents, and stays planted — also makes it an awkward, two-hands job to carry and position. This is not flooring you rearrange on a whim. Plan to place it once, in the spot where your rack or platform is going to live, and accept that shifting it later means a real effort. For a permanent home gym that trade is easy to make; for anyone who expects to reconfigure the room often, it’s worth knowing going in.
The second is the new-rubber smell. Fresh dense rubber comes with an odor out of the wrap, and it’s the thing owners mention most alongside the weight. The reassuring part is that it’s temporary: wipe the mat down, let it breathe in the space, and the smell fades over a week or two. A garage or a room you can air out handles this easily; a closed basement takes a little longer. It’s a short-lived nuisance, not a defect, but if you’re sensitive to smells, give the mat some ventilation for the first stretch rather than sealing it into a small room on day one.
Beyond those two, the limits are just a matter of fit. A single dense mat covers a station, not a whole room — if you want wall-to-wall coverage you’ll be laying several and dealing with the seams between them. And it is overkill for a light corner: putting a heavy rubber mat under nothing but a pair of dumbbells is more mat than the job needs. Neither of these is a flaw in the product; they’re reasons to match the flooring to the load, which is the whole game with a home gym floor.
How it compares
The real comparison isn’t rubber versus rubber — it’s rubber versus foam tiles, and the honest answer is that they solve different problems. A dense rubber stall mat is the heavy-duty choice: it goes under the rack, the platform, and the drop zone, where its mass and toughness earn their keep. Interlocking foam tiles are the light-duty choice: they cushion a dumbbell corner or a stretching area, they weigh almost nothing, and they lift up in minutes when you need to move. Foam is friendlier to renters and easier to live with; rubber is the one that survives heavy iron. We put the two side by side in rubber vs. foam flooring if you want the full breakdown before you commit.
For most first gyms, the smartest setup uses both. A rubber mat like the Mohawk anchors the heavy station, and a run of foam puzzle tiles covers the lighter floor around it. That split keeps the budget sensible — you spend on density only where you drop weight, and use cheaper, softer tiles everywhere else. If your whole gym is a light apartment corner, foam alone may be all you ever need; our apartment home gym guide leans on that approach.
There isn’t much to chase above a dense stall mat at the budget end, either. You can pay a great deal more for interlocking rubber tiles or a purpose-built lifting platform, but for a beginner protecting a floor under a rack, the plain dense mat does the core job that the pricier options do, without the cost. It’s the flooring equivalent of buying the tool that works rather than the tool that looks impressive.
The verdict
The Mohawk heavy-duty rubber stall mat is the flooring we’d actually put under the heavy part of a first home gym. It protects the floor, deadens the noise that gets home lifters in trouble with the people they live with, and gives a rack or platform the stable base it needs — all for the lowest honest cost of any real gym flooring. That combination is why it earns a strong mark from us for a budget piece, and why it belongs in a costed beginner build.
Go in clear-eyed about the two trade-offs: it’s heavy to move, so place it once where it belongs, and it carries a new-rubber smell that fades over a week or two of airing out. Neither is a reason to look past it. If your gym has a rack, a bar, or a set of plates, this mat is the piece that quietly protects everything else you spent on. Pair a dense mat under the rack with lighter foam over the rest of the room and you’ve solved your floor for good.
If you’re still mapping out the room, start with our home gym flooring guide to see exactly what surface goes where, then check how flooring fits the wider budget in our $1,000 Build. Get the floor right once and it’s the last time you’ll think about it — which is exactly what a good, cheap stall mat is for.